
10 Simple yet Amazing Gimbal Moves for Hollywood-like clips
if you’re a filmmaker or videographer and you’re looking to capture epic looking shots of someone, how do you do it well? This video is the answer. In this video you will see 10 easy yeat amazing gimbal moves that will instantly give your footage that cinematic look you are looking for and that even Hollywood directors use.
These simple gimbal moves can be used in short films, promotional videos or documentaries. But regardless of your reason for needing to film these 10 easy-to-execute moves, they will instantly give your footage that high-end hollywood look.
1) The follow
it’s a classic and a nice and easy one to start. We’re simply going to follow our subject from behind keeping an equal distance from them at all times. This is a great shot for showing off your location. Make sure you keep your subject in the center of the frame and as always keep your movement smooth and consistent. Also experiment with your angles focal length and distance from your subject!
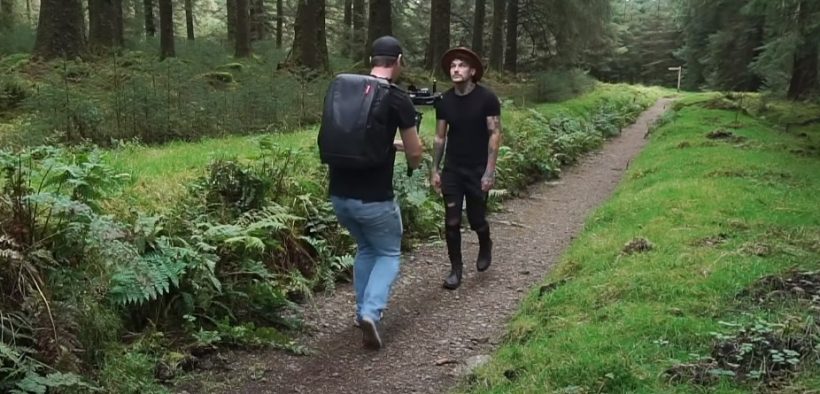
2) The reverse follow
Exactly the same move as the previous, but this time we’re tracking our subject from the front and walking backwards.
Another classic which is used in many hollywood films and a great way of establishing your subject. It can also really help add production value to your footage. Again experiment with your focal lengths and choose the one that works best for you and the story that you’re trying to tell.
3) The step in reveal
Similar to the reverse follow we’re going to track our camera backwards and then have our subject step into frame. Minor choreography is involved with this one but still nice and simple. This is a great way to show off your location and then introduce your subject.
4) The mini jib reveal
Again we’re going to track backwards for this one, only this time we’re going to start on our subject’s feet and then slowly lift our camera up. This is a great shot for revealing your subject.
The framing helps us establish our character: the boots, ripped jeans, tattoos all of this information, helps us get a better understanding of who our character is.
5) The side track
Looks easy but can be a little tricky to execute.
Pro tip: don’t be a crab. A common mistake when first starting out is walking sideways instead of forwards just like a crab. Not only does this look ridiculous but your shot will look awful. Don’t be a crab! Walk forwards whenever possible and frame your shot by turning your camera to either the left or the right. This creates a much smoother shot and
allows you to film your subject in a much easier way.
6) The chest transition
Getting a little bit more creative now and we’re going to need two shots to pull this one off.
Shot number one push forward towards your subject and then stop directly in the middle of their chest: the aim here is to end your shot on a black frame.
Shot number two we now want to start our shot on a black frame: put your camera nice and close to your subject’s back and then move your camera backwards as your subject moves forwards.
Now let’s edit these two clips together using nothing but a simple cut. This couldn’t be easier and it’s transitions like this that help make your footage stand out and keep your audience engaged!
7) The soft focus reveal
We’re going to shoot this one in reverseS start by framing your subject and locking your focus on their face, hold your shot for just a few seconds and then pull backwards until you have a wide shot of your subject.
We’re then going to reverse this shot so that the camera pushes forwards in soft focus and then reveals our subject as we get closer. A great way of adding a bit more intrigue to a character reveal and ensures that you hit your focus every single time!
8) The wipe transition
Again for this we’re going to need two shots.
Shot number one track your subject from the side and use something in the foreground to wipe past the camera. Get your camera nice and close to your foreground and make sure it fills the whole of your frame. We’re looking for an unidentified blurry mess or motion blur shot!
Shot two: we’re now going to start our second shot on an unidentified blurry mess. Better use the same object and try to match the speed of the first shot as this will create a much more seamless transition.
Now let’s edit these two clips together using nothing but a simple cut and just like that we’ve created an in-camera transition that can be created very quickly using any editing software.
9) The orbit
For this one we’re going to walk around our subject in circles, keeping an equal distance from them at all times. It’s best shooting this on a nice, solid ground and try to keep your subject in the center of frame. This is another camera move used in many hollywood films. Director Michael Bay loves this one!
Experiment with your angles and focal length. The wider your shot the more of the environment you will see. Also angle your camera up slightly and you will get a much more dramatic look.
10) The fake drone shot
For this last one get nice and close to your subject, shoot wide and pull back while slowly lifting your gimbal up as high as it will go. Shoot this at a location with an epic view and just like that you’ve shot what looks like a drone shot. Sure, you don’t get the height of a drone with this but it definitely replicates that smooth elevated camera movement usually associated with drones.
Perfect as an ending shot to your sequence or film and great for showing off your location.
So those were 10 gimbal moves. Once you edit them together and create a sequence using music, sound effects and color grading it will be quite amazing.
Those 10 gimbal moves will make anyone look and hopefully for the next time you’re out on a shoot you will have some nice go-to camera moves! 😉


